Introduction
In this Tutorial we are going to see How we can Allocate and Associate the AWS Elastic IP and also how can we disassociate and release the Elastic IP in AWS, but before getting started Let’s see what Elastic IP is and why you use it.
What is Elastic IP
When we create an instance in AWS the AWS provide this instance by default a public IP and it means this is a Dynamic IP and once the instance is stopped or restart AWS will give you another public IP Means the Public IP will be changed and AWS will assign us new public IP this time But if we have any situation where we need a static IP which should never change even after stopping or restart, that’s where AWS’s Elastic IP comes in. It allows us to have a fixed and unchanged Static Public IP for your AWS resources.With Elastic IP, we can associate a static ip to your instance. This is a helpful service where we want to run a service where we cannot afford to change IP for any reason,
AWS’s Elastic IP is flexible and easy to use. Let’s see how we can Allocate and Associate the Elastic IP for our Ec2 Instance.
Step 1:
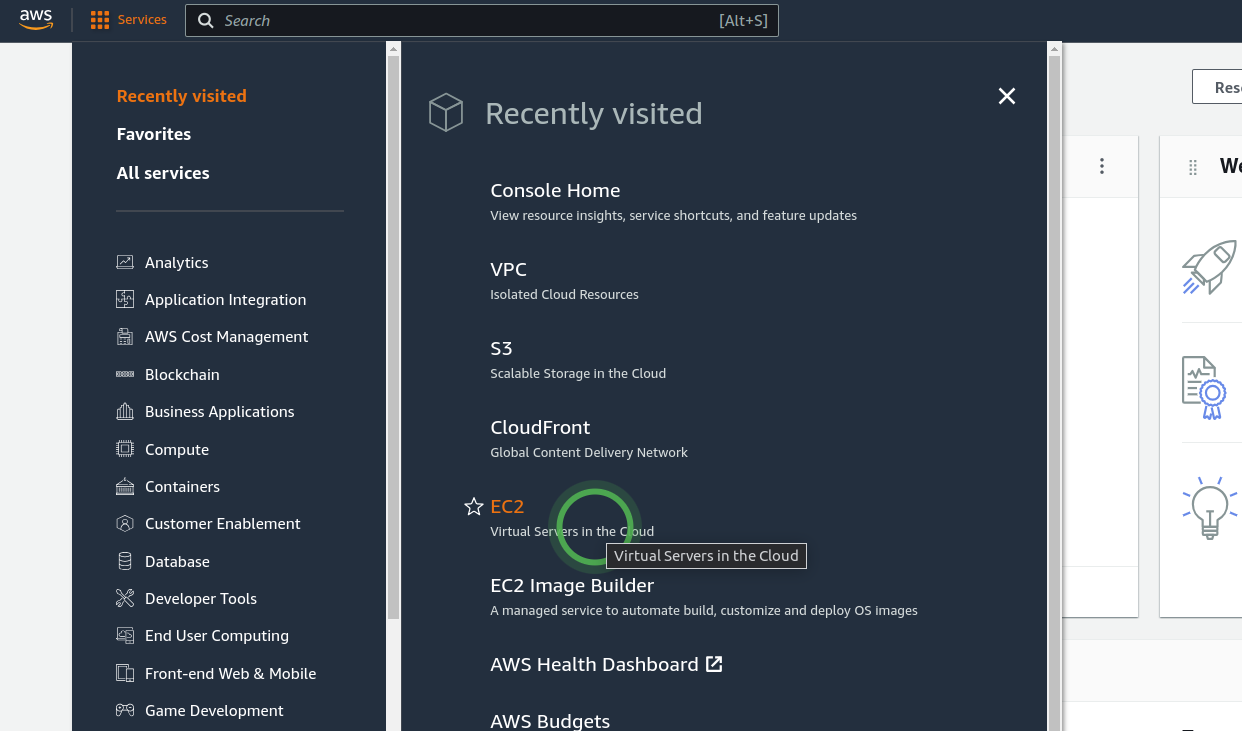
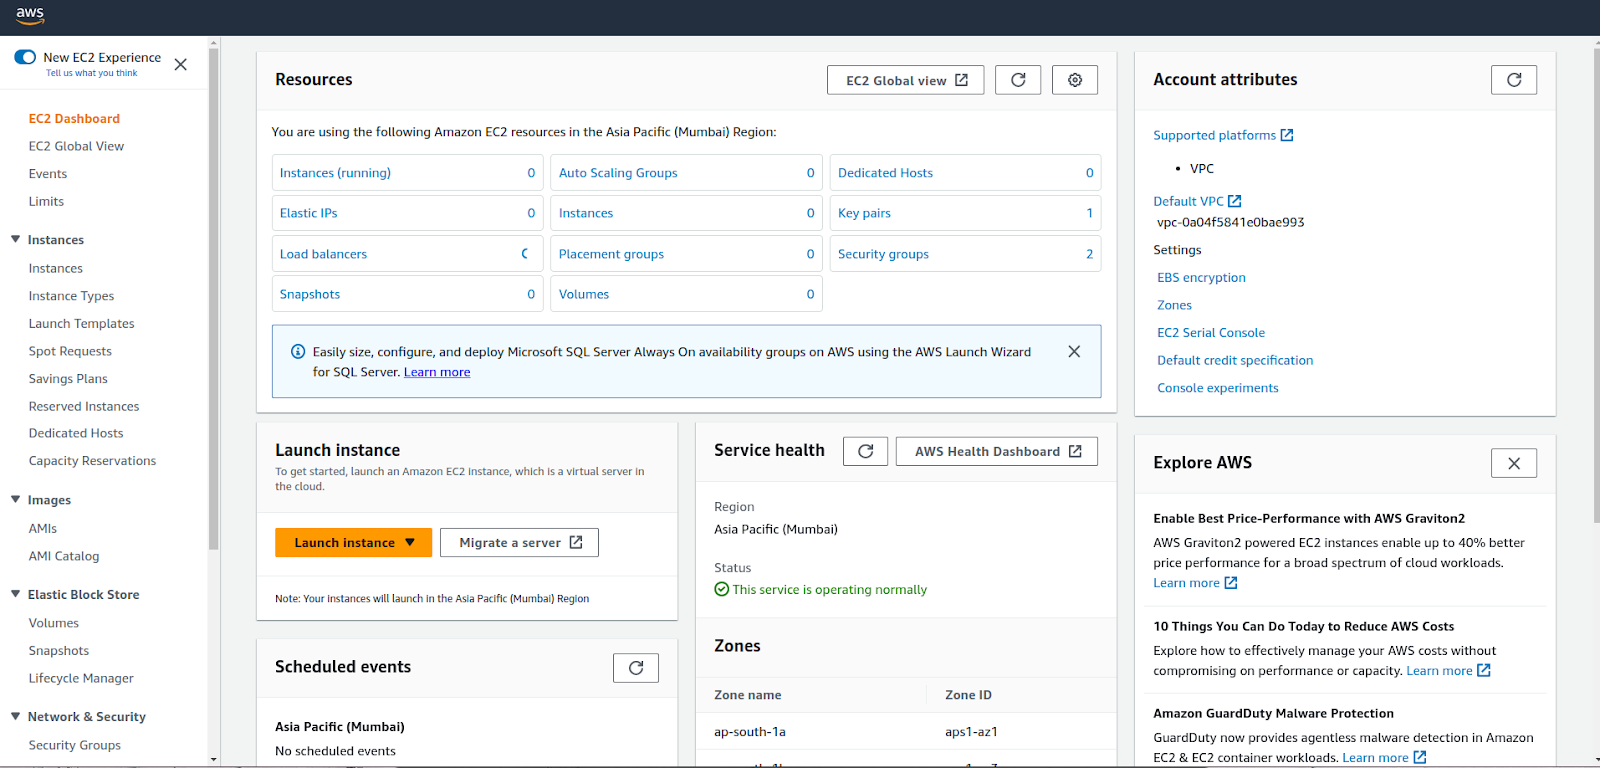
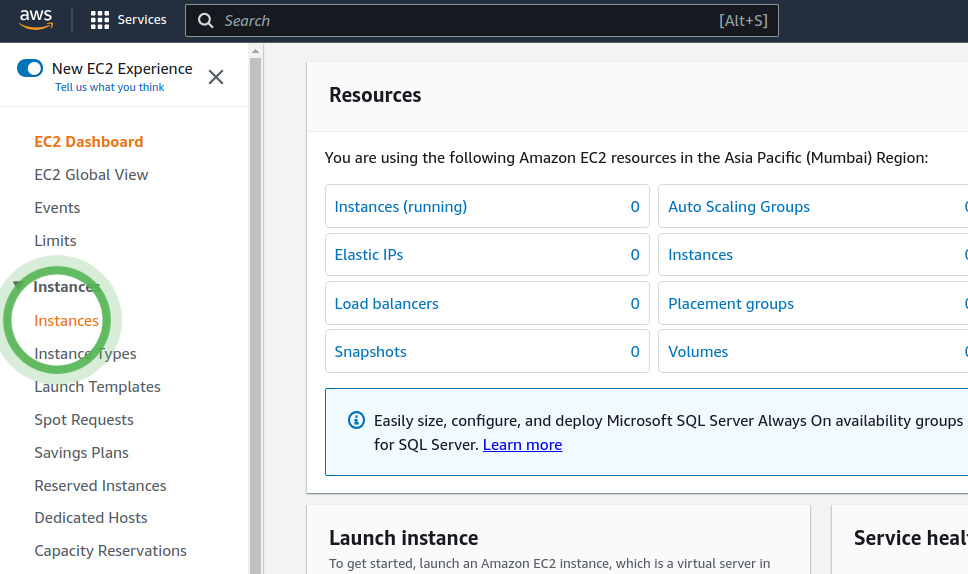
Go to the EC2 service by selecting it from the services menu or by searching EC2 in the search bar. This will take you to the EC2
dashboard.
Step 2:
Now we want to Allocate an Elastic IP Address
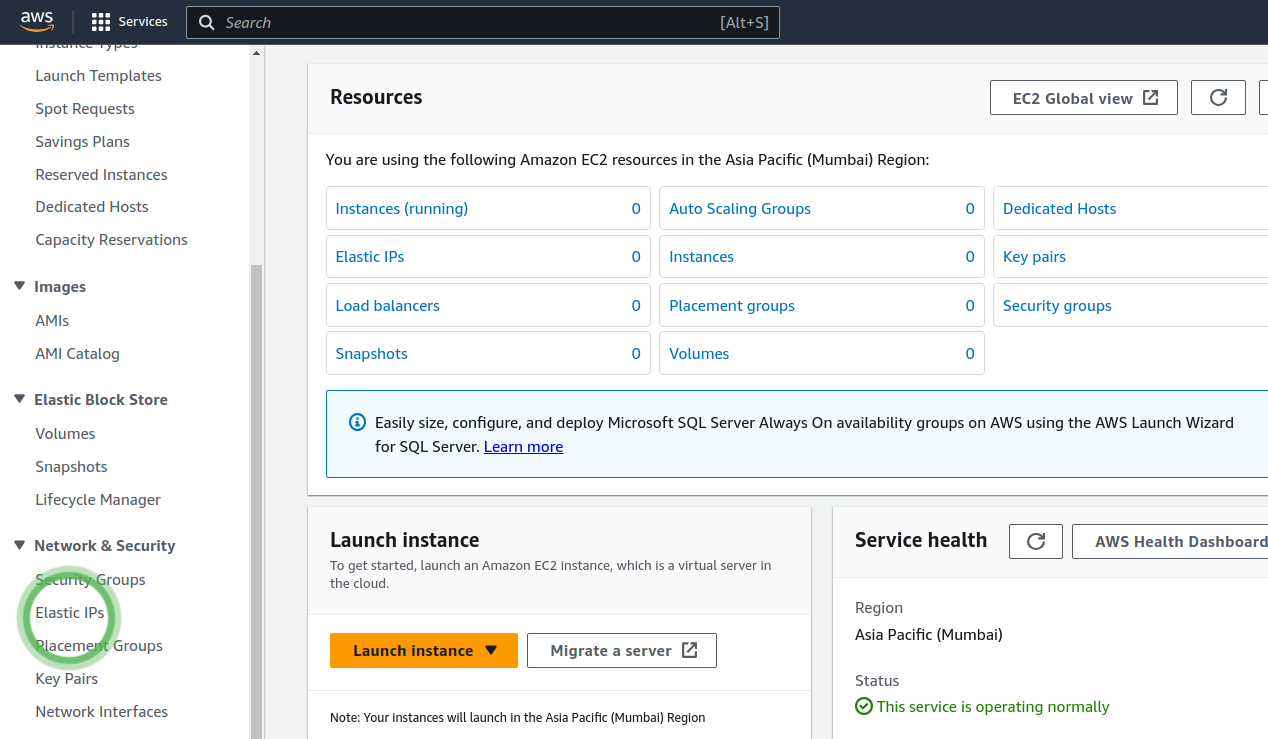
So In the EC2 dashboard, locate the “Elastic IPs” section which is on the left hand side navigation bar, you will see it scrolling a
little and it will be under Network and Security. Click on it.
Now click on the “Allocate Elastic IP address” button on Top Right corner.
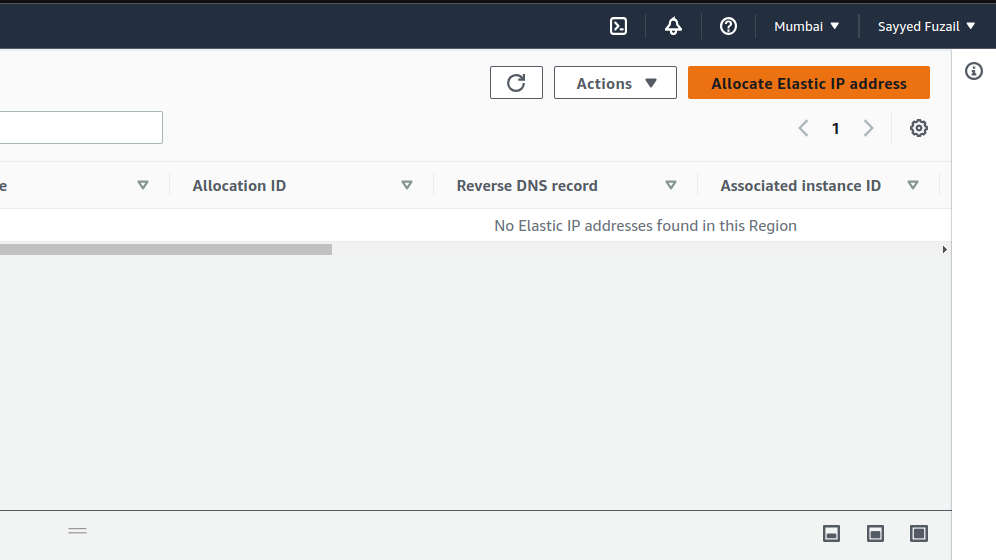
There will be a Network border Group which AWS will automatically select as your region. AWS will assign you
a new Elastic IP address from its pool. Then Click on Allocate button below and
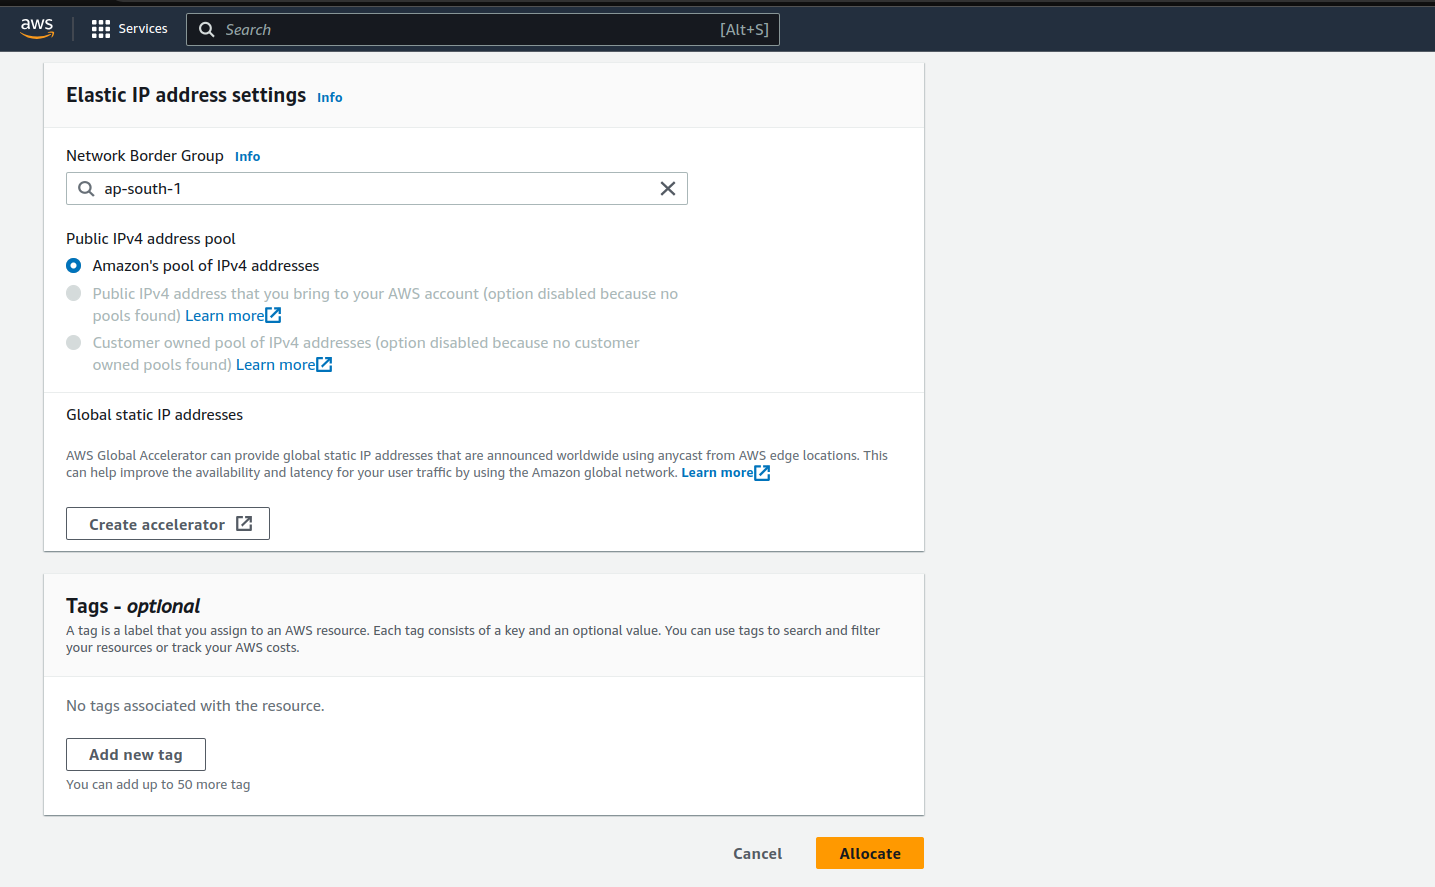
your Elastic IP will be allocated to you and you can see here
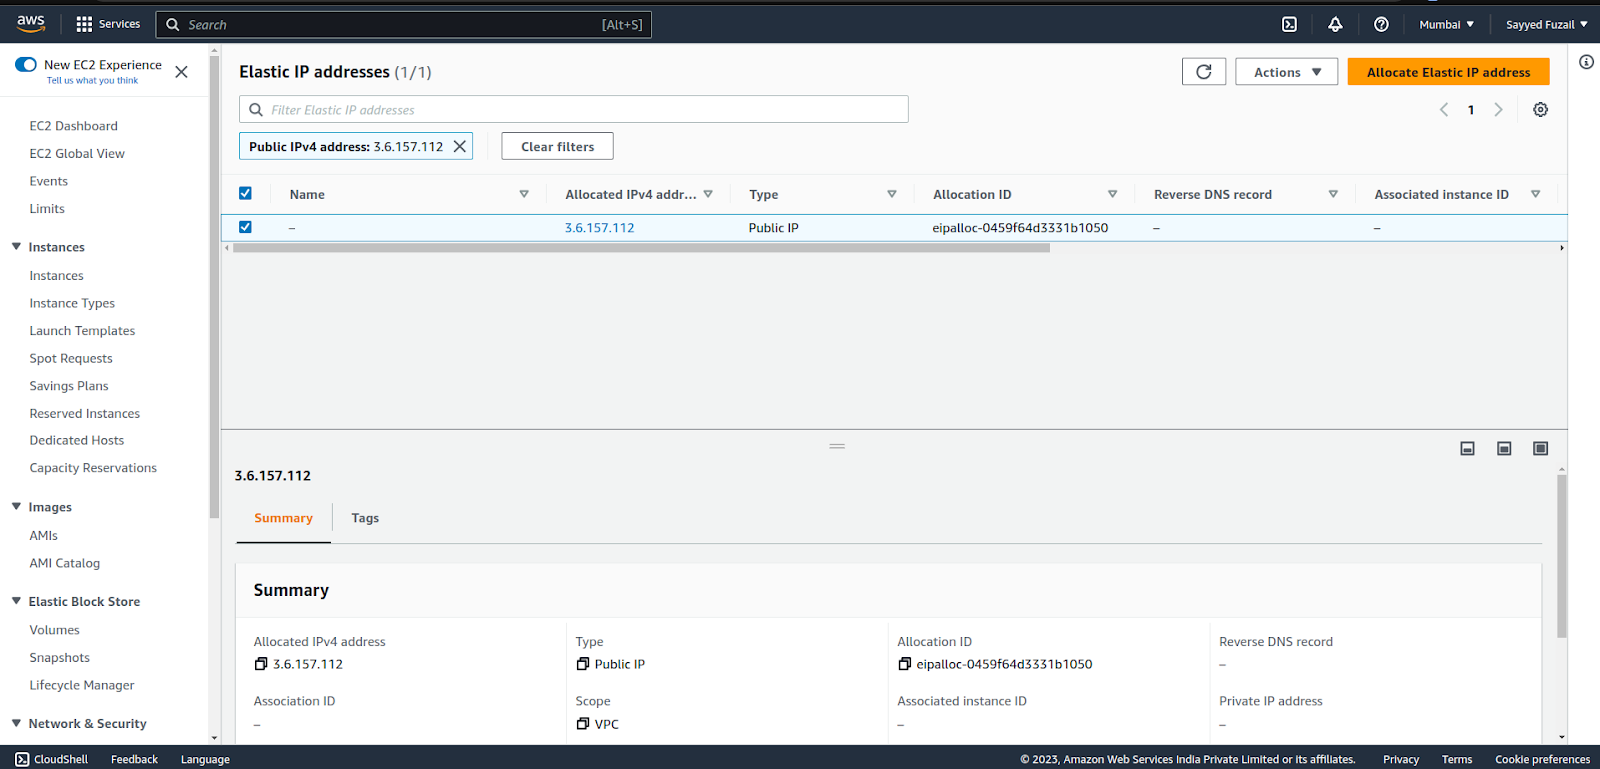
Step 3:
Our Elastic IP is Allocated for us by Amazon and now we have to Associate the Elastic IP with an Instance.
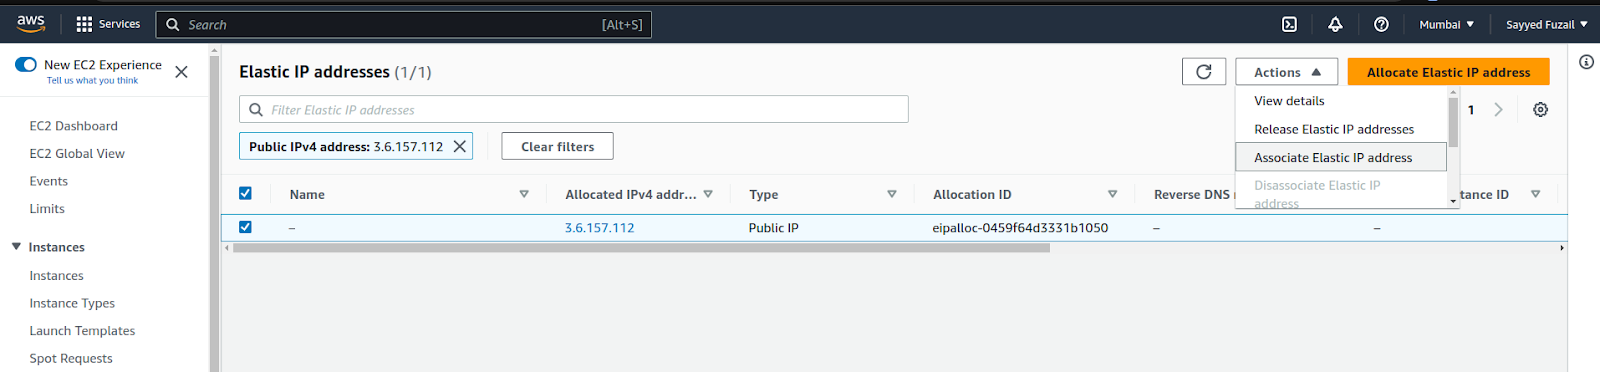
select the IP address you want to associate and click on the “Actions” button. Choose “Associate IP address” from the
dropdown menu.
You will be taken to new page where you have to select a instance which you want to Associate this IP address with
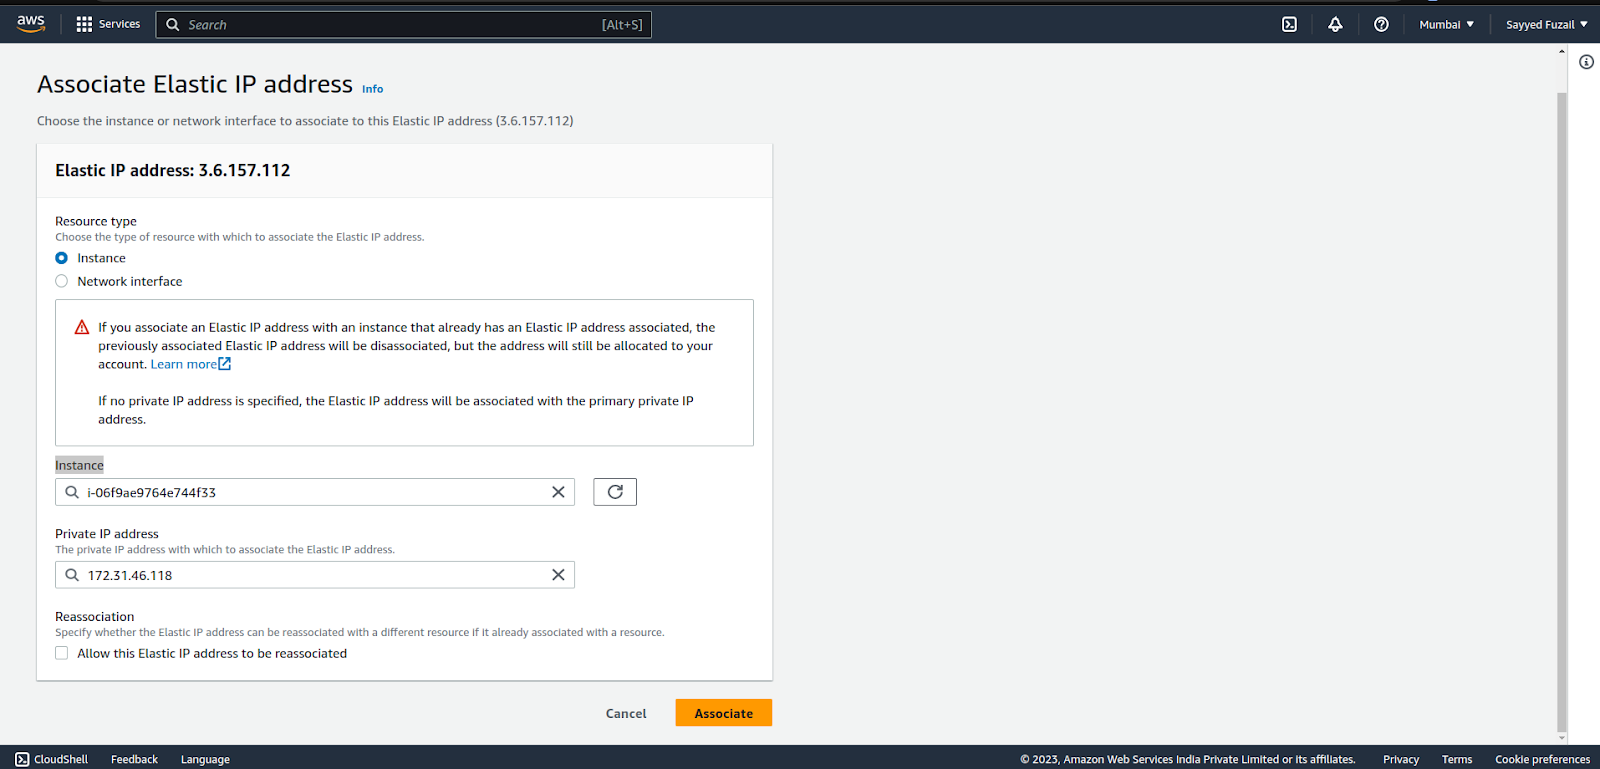
When you click on Instances search bar You will see a list of the instances which are created in this region and choose from
them which one you want to Give the Elastic ip.
After that there is a Private IP address search bar there also select what will appear after the Instance selected.
Down there is a checkbox where Reassociation permission is asked tick it as your needs and then click on “Associate” button
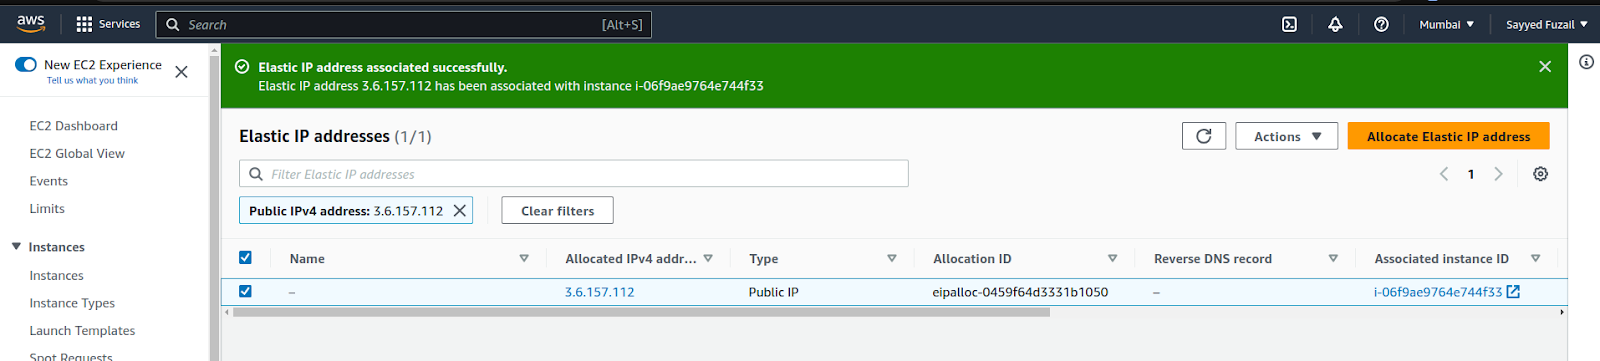
This is how after association you will get a Notification Your Elastic ip is Successfully associated.
Step 4:
Now lets see Our instance got this IP or not
First Just remember the Elastic IP in our Tutorial it is : 3.6.157.112
Now go to “Instances”
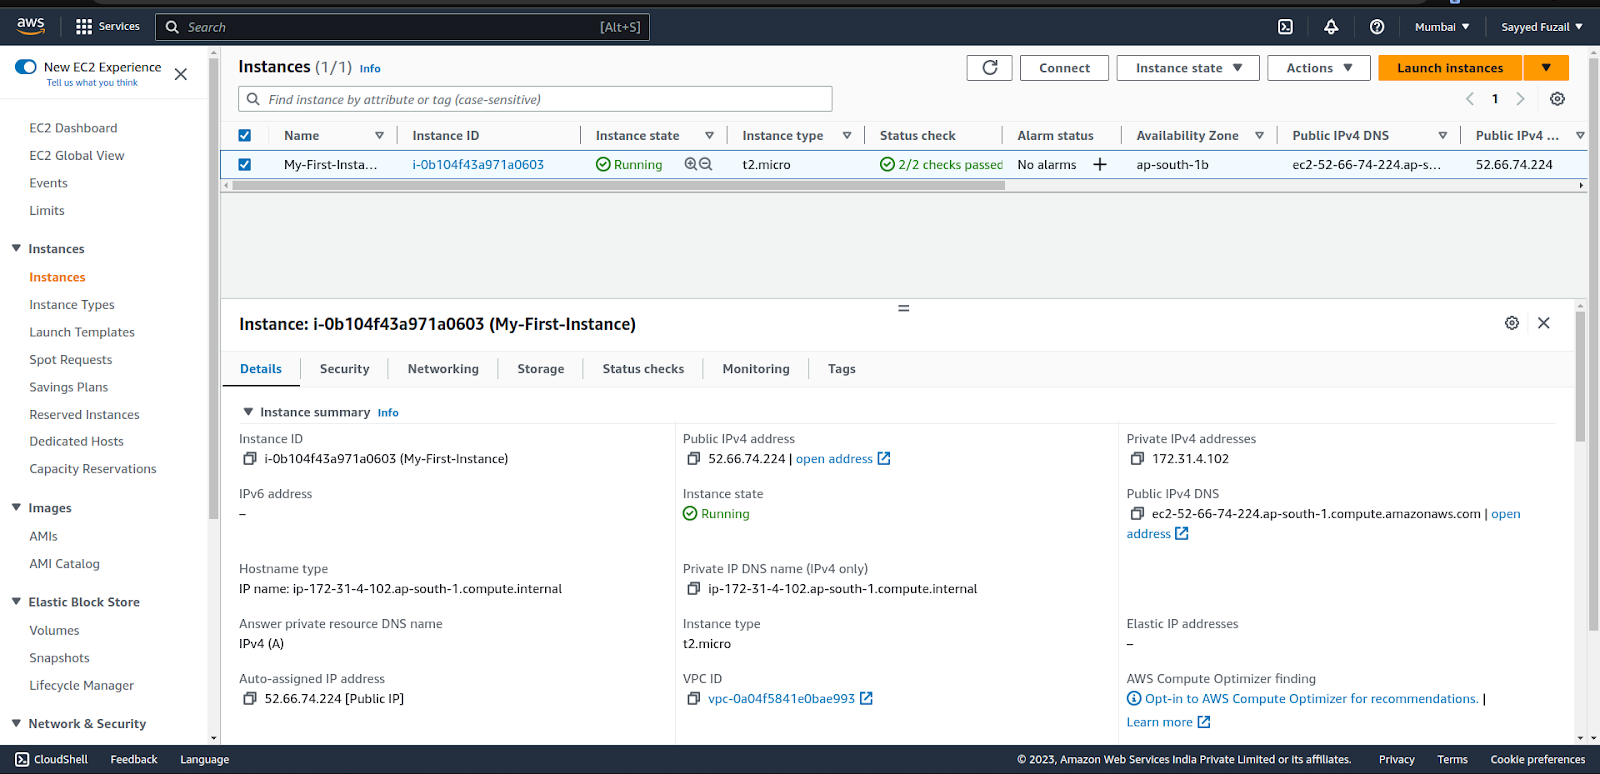
In above screenshot you can see the Public IP of my instance which was ‘Before’ the Elastic IP association now lets see if it is
changed after Association
Select your instance and in Details section check this:
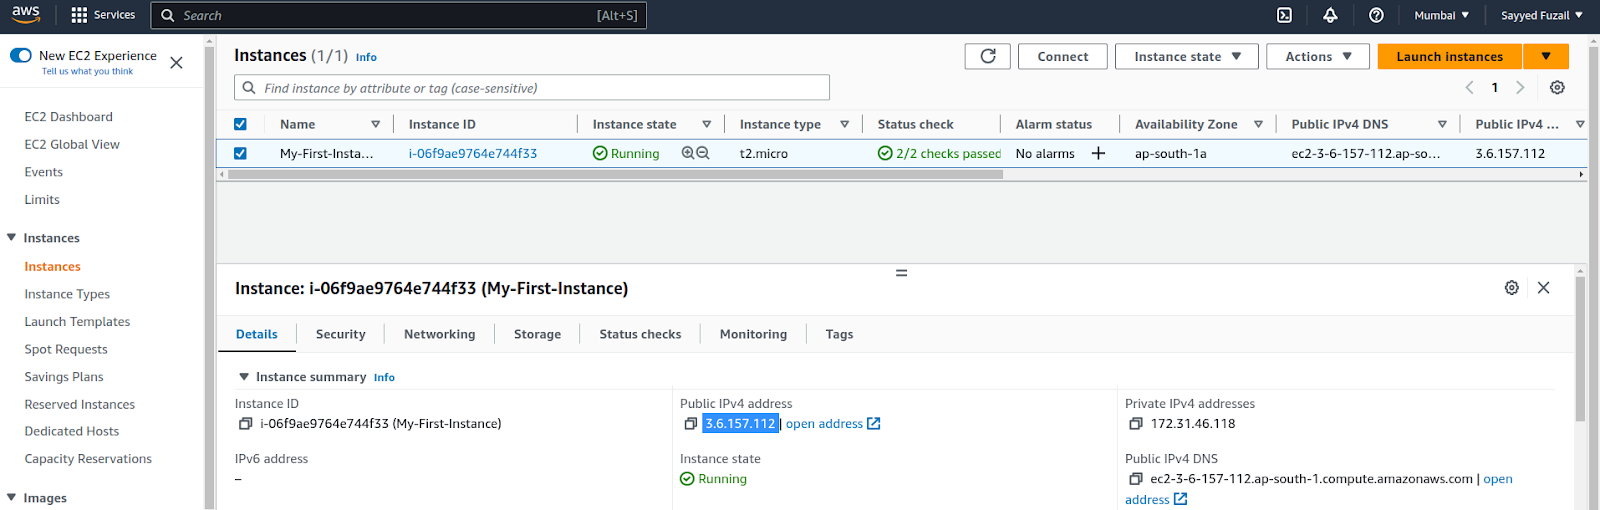
Look at the Highlighted IP address which is the same IP address which we Associated with the Elastic IP address.
With this IP Address if our instance will get stopped or Restarted our ip address will not be changed !
Step 5:
Now lets see how we can Dissociate and Reassociate Elastic IP Addresses
If you need to change the association of an Elastic IP address, you can easily dissociate it from one instance and
reassociate it with another.
In the Elastic IPs section, select the IP address you want to modify, click on the “Actions” button, and choose
“Disassociate IP address.”

Then, You know how to Associate this IP with another Instance or Just see Step number 3 and you will be able to associate
his IP with another instance.
Step 6:
Now you know how to Allocate an Elastic IP and then how to Associate and Disassociate this Elastic IP
Now lets see How we can Release Unused Elastic IP Addresses Release means in AWS it will be Simply deleted from your
Region and Account AWS can give this IP to some other Account.
If you have allocated Elastic IP addresses that are no longer in use, it’s a good practice to release them Because the if you are
not using this Elastic ip means it is not Associated with any resource AWS will charge for this IP
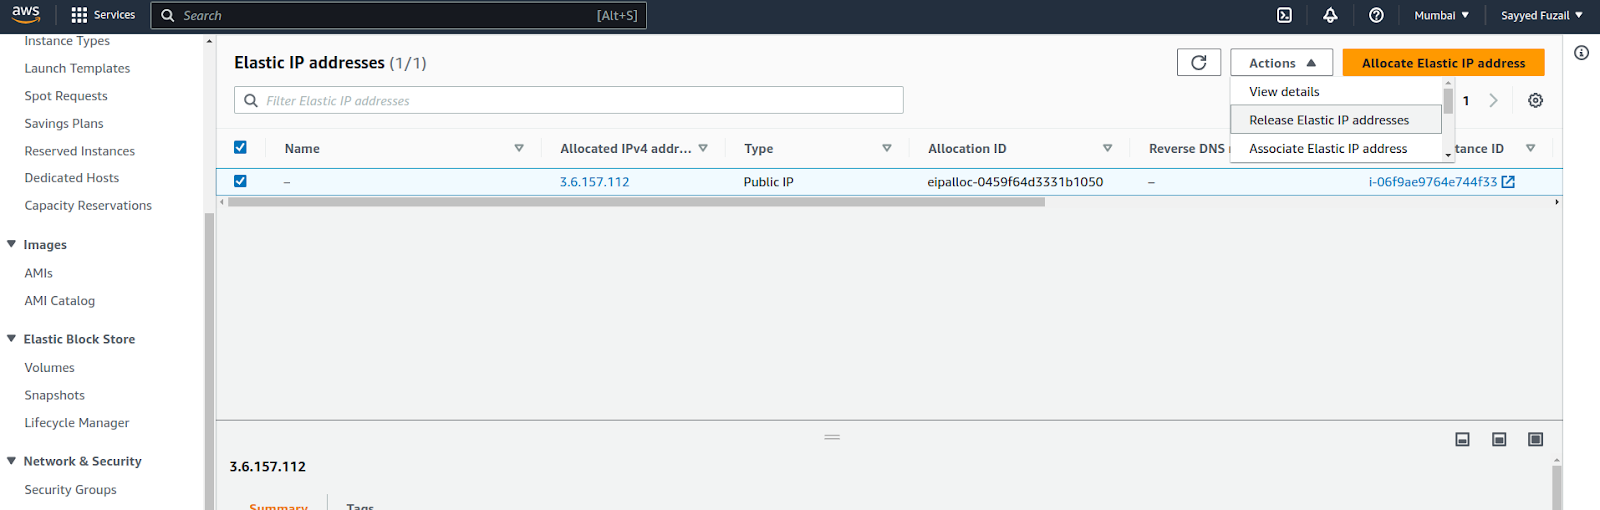
In the Elastic IPs section, select the IP address you want to release, click on the “Actions” button, and from drop down menu
click on “Release addresses”
And this will give error if this IP is associated with any resource so first Disassociate if it happens
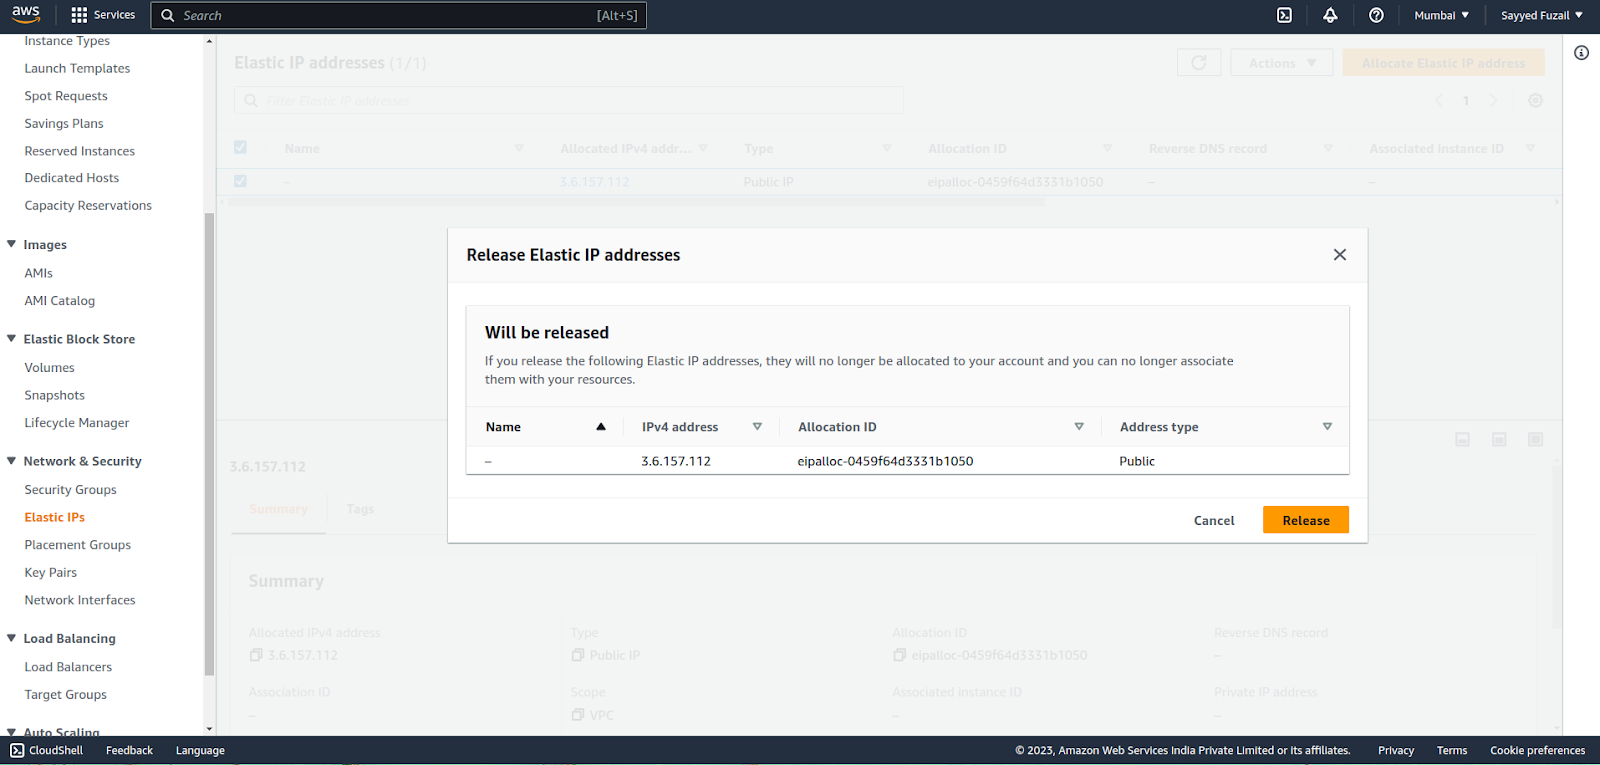
You will be Prompted to confirm Release Elastic IP address so to confirm just click on the “Release” button.
Now you successfully Released the Elastic IP you Allocated and Associated with instances then after disassociation finally
Releasing…

You see now there is no Elastic IP Allocated in this region
Conclusion :
By Now, you will be able to Allocate an Elastic IP address then Associate the Allocated IP with your Instance or Network
Interface, then you can now Disassociate Associated IP and if the IP is not in use you can also Release this IP address. And
more than that you know why we use Elastic IP.
Checkout Our Other Blogs:
Creating a VPC in AWS: Simplified Setup for Secure Networking : https://plainsurf.com/creating-a-vpc-in-aws-simplified-setup-for-secure-networking/
Take daily backup of Mysql database using shellscript : https://plainsurf.com/take-daily-backup-of-database-of-website-using-shellscript/